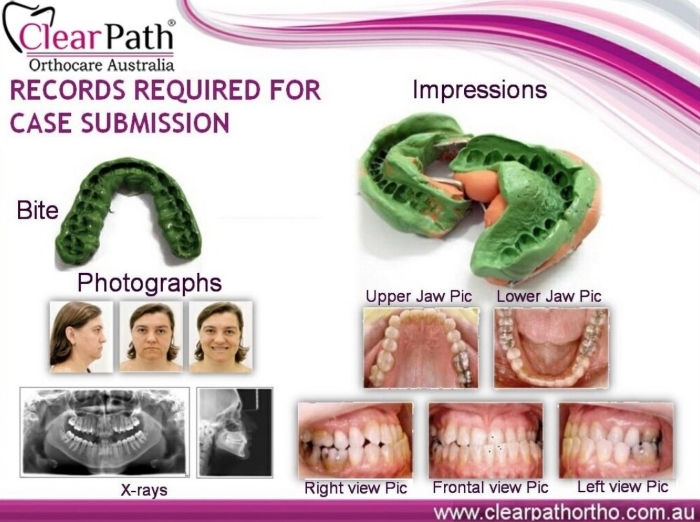
CASE RECORDS SUBMISSION
PVS IMPRESSION
Choice of Material: PVS, polyvinyl siloxane impression material
Technique: 2 step technique:
Things required:
PVS Impression material
Perforated metallic trays
Plastic sheet
Tray adhesive
Prep before taking impression:
Brush teeth
Lipstick or lip balm
Mouth wash
Apply adhesive on the trays
Tip: any dental work should be completed before taking impressions for ClearPath
- Check trays size
- Equal quantity of putty, base and catalyst
- Mix until color is even
- Make a Cylinder form
- Place it over the tray
- Place Plastic wrap
- Take impression
- Remove tray & smooth out any details
- Saliva control
- Inject light body wash
- Take impression & disinfect it
Even for a single arch cases both impressions are required.
|
|
MARGINAL RIDGES
- Follow margins around entire arch both buccal and lingual
- All margins appear crisp and clean (no voids or light imprint)
- Material is not thin in posterior lingual/buccal region
Occlusal Surface
- All cusps and incisal edges how clearly
- No tray appears to show through on cusps or incisal edges of teeth
Molar Region
- Full capture of all molars present till the most distal tooth
Overall Material Adhesion
- No presence of folds
- No presence of “pull away” of heavy body from tray
- Wash is tightly adhering to heavy body
Overall Material Appearance
- No significant amount of body showing through
Tooth-by-Tooth in spection
- No tray of thin wall of material present
- No void areas present
Review Timing, moisture Control, Proper Tray Selection and Technique
|
|
BITE REGISTRATION
PVS BITE MATERIAL OR HARD PUTTY CAN BE USED
Technique:
- Prep before taking bite
- Dispense small amount of material
- Inject the material directly onto patient’s teeth
- A lay of 4-5 mm
- Ask the patient to bite down in centric acclussion
- Disinfect the bite registration
Tip: Due to stiffness of the bite material, severe undercuts should be removed or blocked out.
2- DIGITAL CASE RECORDS – PHOTOGRAPHS & RADIOGRAPHS |
PHOTOGRAPHS & RADIOGRAPHS
Following 2 types of X-rays are required.
OPG which is Orthopentaomograph also called a Panorax
Lateral Ceph which is lateral cephalograph
Intra-oral Photographs:
Following views are required
- Intra-oral Upper occlusal view
- Intra-oral Lower occlusal view
- Intra-oral Left buccal view
- Intra-oral Right buccal view
- Intra-oral Frontal view
Extra Oral Photographs:
- Side profile
- Frontal profile
- Frontal profile with smile


